Welcome in 2016!
Everybody starts new year with some New Year’s resolutions. I want to be more productive at work. So here is a list of things which I discovered and they helped me a lot.
Hello there! It’s been awhile since last post. Sorry š
Let’s talk about JavaScript linting.Ā If you don’t know what is it – go toĀ wikipedia.
Currently we have four linting tools available:
Continue reading ESLint – install and config – PhpStorm/WebStorm and git pre commit hook
Hello!
Recently I wrote a post about configuring the Karma with RequireJS and PhantomJS (http://damian.dziaduch.pl/2015/09/12/karma-among-with-jasmine-requirejs-and-phantomjs/).
Today I’d like to move on and use the Karma inside the IDE instead of terminal.Ā Before we start make sure you have installed & enabledĀ Karma plugin andĀ JavaScript debugger pluginĀ in PhpStorm. I’m going to work on my previous example.
Continue reading Running and debugging Karma in PhpStorm / WebStorm
Welcome in third part of my tutorial!
Today we are going to learn common thing while code refactor – class movement.
What I always did was to manually move the file in theĀ Finder and then changed it’sĀ namespace in the IDE. Finally I had to search whole project for class name etc.Ā ButĀ PhpStormĀ can do all of that with one simple action.
I’m going to move the classĀ \app\models\UserĀ to \common\models\UserĀ (Yii2 project).
Let me show you the beginning of my class:
<?php
namespace app\models;
use yii\base\Exception;
use yii\base\Model;
use yii\base\NotSupportedException;
use yii\web\IdentityInterface;
class User extends Model implements IdentityInterface
{
First thing what you need to do is to move the cursor into class name and open refactor menu (right click -> refactor, or press ctrl + t) and chooseĀ Move.
Fill the target namespace. I always check two checkboxes,Ā Search in comments and string andĀ Search for textĀ occurrences. This will allows us to refactor theĀ PHPDoc,Ā comments and other places where the class name exists.
Before pressing theĀ Refactor button, I recommend toĀ Preview the changes. All found places you will see on the list like this:
With second mouse button you can exclude results from refactoring. When you’re done, pressĀ Do Refactor. Now run your tests. Everything should work like as a charm!
Thank you for reading. Have a good day!
Hello again.
This will be quick. Let’s take an example:
public function testAction($firstName, $lastName, $address)
{
$data = ['firstName' => $firstName, 'lastName' => $lastName, 'address' => $address];
$filteredData = [];
foreach ($data as $key => $value) {
$filteredData[$key] = str_replace('!@#$%^&*(', '', $value);
}
return $this->render('test', [
'data' => $filteredData
]);
}
This method is doing too much. We want to extract new method which will filter the data and return the result. Please highlight the marek lines and press Refactor This button (ctrl + t). ChooseĀ Extract method. New window will appear. You can now customise your new method – Ā parameters order, visibility, PHPDoc and many many more. Im most cases you only need to add new method name and press enter – IDE fills all needed data for you. In this example I named new methodĀ filterData. Here’s the code after quick refactor:
public function testAction($firstName, $lastName, $address)
{
$data = ['firstName' => $firstName, 'lastName' => $lastName, 'address' => $address];
$filteredData = $this->filterData($data);
return $this->render('test', [
'data' => $filteredData
]);
}
/**
* @param $data
*
* @return array
*/
private function filterData($data)
{
$filteredData = [];
foreach ($data as $key => $value) {
$filteredData[$key] = str_replace('!@#$%^&*(', '', $value);
}
return $filteredData;
}
And that’s all :). Enjoy and tuned for next part. Cheers!
PhpStorm like all JetBrains IDEs has o lot of built in features. And you can add even more with plugins. It provides many refactoring features.
This will be a first part of refactoring tutorial.
We will start from the simple things.
Lesson 1: Extracting a variable and renaming it.
Example code to be refactored:
'use strict';
$('#container').addClass('example');
$('#container').on('click', function () {
alert('hello');
});
$('#container').remove();
This code is bad. If you use jQuery object more than once, assign it to variable.
First let’s extract variable. Move cursor toĀ anyĀ occurrence ofĀ $(‘#container’)Ā in the code and pressĀ ctrl+r. Menu will appear, now selectĀ Extract variable. IDE gives you ability to replaceĀ allĀ occurrencesĀ or just the highlighted one. We want to replace all of them. Choose it. Now we have ability to name the variable.Ā IDE suggest names by the code, in most cases it gives Ā correct name, but we can changeĀ it :).
Code after refactor:
'use strict';
var $container = $( '#container' );
$container.addClass('example');
$container.on('click', function () {
alert('hello');
});
$container.remove();
Next thing. We have extracted the variable but later we decide that current name is not obvious. Naming is very important so we want to change it. Move cursor toĀ any occurrence of variable $container and againĀ pressĀ ā+rĀ (on Mac)Ā orĀ ctrl+rĀ (on other os). In the menu choose first position,Ā Rename. Place a new name in the popup and do refactor.
'use strict';
var jQueryContainer = $( '#container' );
jQueryContainer.addClass('example');
jQueryContainer.on('click', function () {
alert('hello');
});
jQueryContainer.remove();
You have ability to search the whole project forĀ occurrences of the variable name in the string / comment and text . Try it by yourself, it’s very handy :).
That’s all for today. See you in the next part.
This time something about JavaScript. Everybody likes JavaScript :P.
I’d like to write quick guide how to set up working tests environment.
First, what we need:
Let get all required things by NPM. Create aĀ package.jsonĀ with content:
{
"name": "tests",
"description": "tests",
"dependencies": {
"karma-jasmine": "*",
"karma-cli": "*",
"karma-requirejs": "*",
"karma-phantomjs-launcher": "*"
}
}
Now run the command:
npm install
Great. We have now all required dependencies.
Next thing is to configure Karma. There are two ways of doing this, manually by creating a karma config file or using karma creator (karma init command). I prefer doing it manually. Create a new file and name itĀ karma.conf.js. Here’s my file with comments:
module.exports = function ( config ) {
config.set( {
// base path that will be used to resolve all patterns (eg. files, exclude)
basePath: '.',
// frameworks to use
frameworks: [ 'jasmine', 'requirejs' ],
// list of files / patterns to load in the browser
files: [
'tests/main.js', // this is a main file which is booting up our test
{ pattern: 'tests/**/*.js', included: false }, // this is where are your specs, please do not include them!
{ pattern: 'src/**/*.js', included: false } // this is where are your source files, please do not include them!
],
// list of files to exclude
exclude: [],
// test results reporter to use
// possible values: 'dots', 'progress'
// available reporters: https://npmjs.org/browse/keyword/karma-reporter
reporters: [ 'progress' ],
// web server port
port: 9876,
// enable / disable colors in the output (reporters and logs)
colors: true,
// level of logging
// possible values: config.LOG_DISABLE || config.LOG_ERROR || config.LOG_WARN || config.LOG_INFO ||
// config.LOG_DEBUG
logLevel: config.LOG_INFO,
// enable / disable watching file and executing tests whenever any file changes
autoWatch: true,
// start these browsers
// available browser launchers: https://npmjs.org/browse/keyword/karma-launcher
browsers: [ 'PhantomJS' ],
// set this to true when your want do to a single run, usefull to CI
singleRun: false
} )
};
Basically what you need to change isĀ basePath andĀ files / exclude. But that’s not all. We need to create another file which will run asynchronousĀ our test withĀ RequireJS. Let’s place this file in theĀ testsĀ andĀ name itĀ main.js. This is the only file which is included by karma. Content of theĀ file:
// RequireJS deps
var deps = [];
// Get a list of all the test files to include
Object.keys( window.__karma__.files ).forEach( function ( file ) {
if ( /(spec|test)\.js$/i.test( file ) ) {
deps.push( file );
}
} );
require.config( {
// Karma serves files under /base, which is the basePath from your config file
baseUrl: '/base/src',
// dynamically load all test files
deps: deps,
// we have to kickoff jasmine, as it is asynchronous
callback: window.__karma__.start
} );
VariableĀ window.__karma__.files comesĀ fromĀ karma.conf.jsĀ files section. We need to filter them as we want to require only tests files.Ā The source files will be declared asĀ dependencies of each test file.
Let’s create a example test fileĀ tests/exampleSpec.js and put in it:
define( [ 'example' ], function ( example ) {
"use strict";
describe( 'example', function () {
it( 'is defined', function () {
expect( example ).not.toBe( undefined );
} )
} );
} );
We are defining a spec which has source file as a dependency. RequireJS injects it’s to our spec and we can now test it with Jasmine. How cool is that?
Let’s define our example viaĀ src/example.js:
define( function () {
return {};
} );
The last thing which need to be done is to export the variable which will tell Karma where PhantomJS binary is:
export PHANTOMJS_BIN=./node_modules/.bin/phantomjs
Now let’s run Karma:
node ./node_modules/.bin/karma start karma.conf.js
Finally you should see something like this:
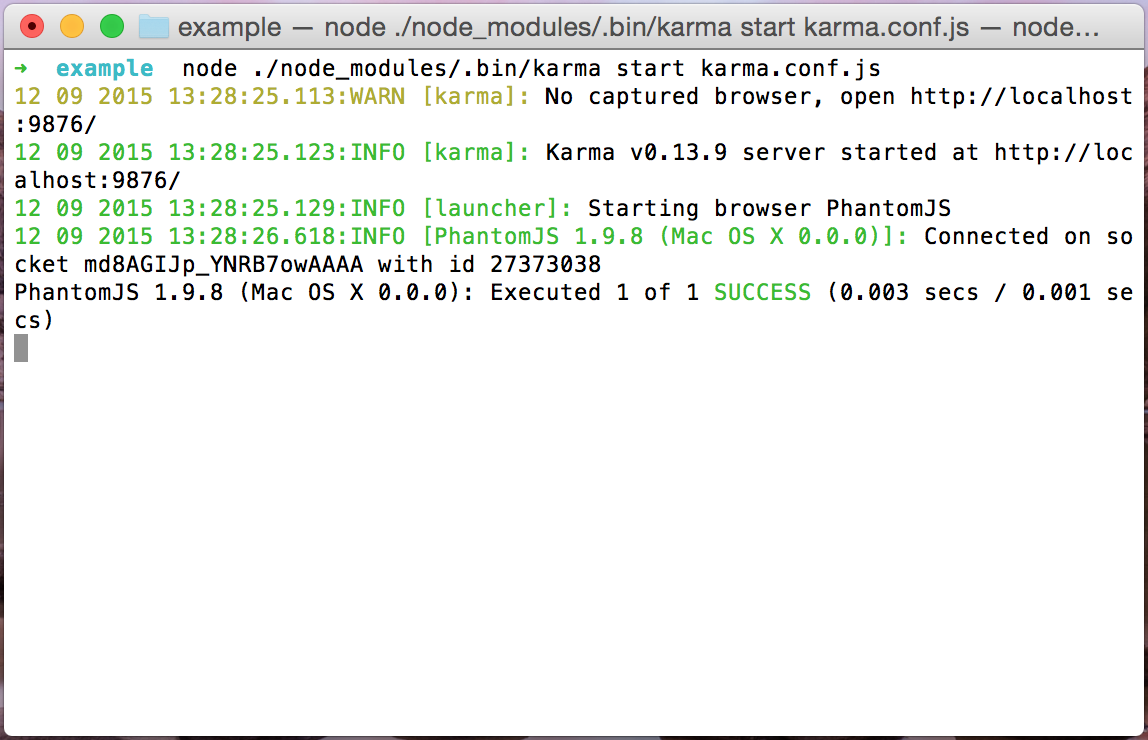
If you have any problems with PhantomJS – maybe you need to install some libs required by it. Check it’s website for more info. Other solution is to try different browser – Chrome, Firefox etc. But this can’t be done via SSH… š
Any problems, suggestions, feel free to comment.
Hi.
CLI debugging. I never did that. Until today. My tests started to fail and I had no idea why.
So that’s my story why I started to debug tests in the CLI via SSH.
Here’s a list of ingredients:
First thing what we need to do is to configure the PhpStorm.
Open your setting and go toĀ Languages & Frameworks >Ā PHP >Ā Debug >Ā DBGp Proxy.
Next thing to configure isĀ Language & Frameworks >Ā PHP >Ā Servers.
Ok PhpStorm is ready to go.
Now go toĀ SSH and run this command:
export PHP_IDE_CONFIG="serverName=VAGRANT" export XDEBUG_CONFIG="remote_host=10.0.2.2 idekey=PHPSTORM remote_connect_back=0"
In the first line put yourĀ ServerĀ Name which you’ve just set. In the second just update the remote_host with theĀ IP address and change theĀ idekey to yours.
The last thing to do is to enable listening for debug connections in theĀ PhpStorm. Just click the button in the top right corner:
Ah I forgot, please add someĀ breakpoints! And then you can run your tests / scripts etc.
Enjoy š
I’m pretty sure that you use many documentations, for frameworks, languages and libraries. You have to addĀ many pages to favourites or google for them. But there is a solution for this. And it’s ultraĀ practical.
Just go toĀ http://devdocs.io.
Quick info:
How to use it? Simply choose docs which you want to have in the left sidebar. Then type something in search bar and instantly you will have the resultsĀ š How cool is that?
So scrap all your favourites and start using DevDocs!
Hi.
As you may know, all programers who want to more effective and productive should train. There are small tests that are calledĀ Kata. You should do them every single day.
Here’s my latest discover, excellentĀ site with manyĀ Katas.
Enjoy! š